Your Cart
Have everything you need?
Your Wishlist
10 Tips for Laying Floor Tiles Like a Pro
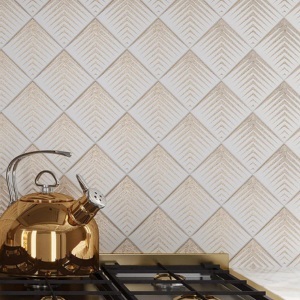
Euro Bath and Tile offers an expansive range of luxurious bathroom and tile products that cater to a range of tastes and styles, whether you are looking for contemporary or artisanal designs.
Tiling a floor can transform any space, whether it’s a bathroom, kitchen, or living area. For South African homeowners, DIY enthusiasts, and even interior designers, mastering the art of tile installation is a rewarding skill that saves money and adds value to your home. At Eurobath and Tile, we believe that with the right techniques and tools, anyone can achieve professional-quality results. In this step-by-step guide, we’ll share 10 essential tips for laying tiles, tailored specifically for South African conditions, to help you create durable, water-resistant floors that stand the test of time.
Whether you’re working with porcelain tiles, large format tiles, or any other floor tile, these tips will streamline your tiling projects and ensure a flawless finish. Let’s dive in!
1. Prepare Your Surface for Perfect Tile Installation
A successful tiling project starts with a solid foundation. Before laying tiles, ensure your surface is clean, dry, and level. In South Africa’s diverse climates, moisture can be a concern, so check for dampness and address it with a water-resistant underlay if needed. Remove dust, debris, and old flooring, then use a levelling compound to smooth out uneven areas. A flat surface prevents cracked tiles and ensures your thin set adhesive bonds effectively, setting the stage for stunning results.

2. Plan Your Tile Layout for Balanced Results
Planning is key to avoiding awkward cuts and misaligned grout lines. Start by finding the room’s centre point—measure the length and width, then mark where they intersect. Lay out a row of tiles (without adhesive) from this point to visualise the layout. This dry run helps you adjust for cut tiles at the edges, ensuring symmetry. For large format tiles, this step is especially crucial to minimise waste and maintain a polished look across your tiling work.
3. Choose the Right Thin Set for Your Floor Tiles
The adhesive you use can make or break your tile installation. For most floor tiles in South Africa, a thin set mortar is ideal, particularly for porcelain tiles or large tiles. Thin set provides a strong, durable bond and is versatile enough for various surfaces. Check that your choice is water-resistant, especially in wet areas like bathrooms. Mix it according to the manufacturer’s instructions for the best consistency—too runny, and your tiles might shift; too thick, and adhesion could fail.
4. Use Tile Spacers for Even Grout Lines
Consistent grout lines are the hallmark of professional tiling work. Tile spacers—small plastic inserts—ensure uniform gaps between each tile, making grouting easier and enhancing the final look. For large format tiles, opt for slightly wider spacers (e.g., 3mm) to accommodate expansion, while smaller floor tiles might need 2mm spacers. This simple tool keeps your row of tiles straight and your design cohesive.
5. Cut Tiles Precisely with a Diamond Wet Saw
When it’s time to cut tiles for edges or corners, precision is everything. A diamond wet saw is your best friend for tackling porcelain tiles or large tiles without cracking them. Mark your tile with a pencil, then guide it slowly through the saw for a clean, accurate cut. This tool is especially useful in South Africa, where unique room shapes often demand custom cuts. Take your time—rushing can lead to costly mistakes.
6. Apply Thin Set Evenly for a Strong Bond
Proper application of thin set is critical for laying tiles securely. Use a notched trowel to spread the adhesive over a small section of the floor—only what you can tile in 20–30 minutes before it sets. Run the notched edge through the thin set to create grooves, ensuring even coverage. Press each tile into place with a slight twist to lock it into the adhesive, guaranteeing a water-resistant and long-lasting floor.
7. Lay Tiles Systematically from the Centre
Begin laying tiles at the room’s centre point, working outwards in a systematic pattern. This approach ensures your row of tiles remains aligned and balanced, with cut tiles relegated to the edges where they’re less noticeable. For large format tiles, double-check alignment with a spirit level after every few tiles. Patience here pays off—rushing can throw off your entire tiling project.
8. Check Levels Consistently for a Smooth Finish
Uneven tiles can ruin an otherwise perfect floor. Use a spirit level regularly as you work to ensure each tile sits flush with its neighbours. If you spot a dip, lift the tile, add more thin set or levelling compound, and reposition it. This step is vital for large tiles, where even slight variations are more noticeable. A level floor not only looks better but also feels better underfoot.
9. Grout with Care for Durable, Water-Resistant Results
Once your tiles are set (allow 24 hours for the thin set to cure), it’s time to grout. Mix your grout to a smooth, peanut butter-like consistency, then use a rubber float to press it into the grout lines. Work in small sections, wiping excess grout off the tiles with a damp sponge before it hardens. Clean grout lines enhance the beauty of your floor tile and protect against moisture—a must in South Africa’s humid regions.
10. Seal and Finish for Long-Lasting Beauty
The final touch in your tiling project is sealing the grout lines. After the grout cures (typically 48–72 hours), apply a quality grout sealer to make it water-resistant and stain-proof. This step is especially important for porcelain tiles in high-traffic areas. Finish by cleaning the floor thoroughly to remove any residue, revealing the full brilliance of your work. With proper care, your floor will stay stunning for years.

Ready to Start Your Tiling Project?
Laying floor tiles doesn’t have to be daunting. With these 10 tips, you’re equipped to tackle tile installation like a pro, creating beautiful, functional spaces in your South African home. From choosing the right thin set to perfecting your grout lines, every step counts. And when it comes to sourcing top-quality floor tiles, Eurobath and Tile has you covered.
Explore our wide range of porcelain tiles, large format options, and more at https://www.eurobath.co.za/tiles/. Shop now and turn your tiling dreams into reality with Eurobath and Tile—your trusted partner for premium tiling solutions in South Africa!
Visit Euro Bath and Tile Today
At Euro Bath and Tile, we are dedicated to helping you find the perfect shower heads and plumbing fixtures for your bathroom. Visit our showroom or browse our online catalog to explore our extensive collection. Our expert team is here to provide personalized recommendations and assist you with all your bathroom needs.
Upgrade your bathroom with premium shower heads and plumbing fixtures from Euro Bath and Tile. Whether you’re in Cape Town, Johannesburg, or anywhere else in South Africa, we have the perfect products for your home improvement project. Contact us today to get started!
Answer: Preparing your surface is the foundation of successful tile installation. Start by ensuring the floor is clean, dry, and free of dust or debris. In South Africa’s humid climates, check for moisture and use a water-resistant underlay if needed. Apply a levelling compound to fix uneven spots, creating a flat base for your thin set adhesive. A well-prepared surface ensures your floor tiles, like the porcelain tiles available at Eurobath and Tile, adhere properly and last longer. Shop our range at https://www.eurobath.co.za/tiles/ to get started!
Answer: Planning your tile layout is crucial, especially for large format tiles. Measure the room’s length and width to find the centre point, then mark it. Lay out a row of tiles without adhesive to test the design, adjusting to minimise cut tiles at the edges. This step-by-step guide helps you achieve even grout lines and a balanced look. For premium large tiles perfect for your tiling projects, explore Eurobath and Tile’s collection at https://www.eurobath.co.za/tiles/.
Answer: For porcelain tiles, a thin set mortar is your best choice. It’s strong, versatile, and ideal for floor tile installation in South Africa, especially in wet areas where water-resistant properties are key. Mix it to the right consistency—neither too runny nor too thick—and apply it evenly with a notched trowel. Pair your thin set with top-quality porcelain tiles from Eurobath and Tile, available at https://www.eurobath.co.za/tiles/, for a durable, professional finish.
Answer: Cutting tiles precisely is essential for a polished look, particularly at edges and corners. Use a diamond wet saw for clean cuts on porcelain tiles or large tiles—mark your tile with a pencil, then guide it slowly through the saw. This tool reduces breakage and ensures your cut tiles fit perfectly. Need the right tiles for your project? Check out Eurobath and Tile’s selection at https://www.eurobath.co.za/tiles/ to complete your tiling work with ease.
Answer: Grouting seals the deal on your tiling project, protecting your floor tiles from moisture and wear—crucial in South Africa’s diverse climates. After laying tiles, mix grout to a smooth consistency and press it into the grout lines with a rubber float. Clean excess grout promptly, then seal it after curing for a water-resistant finish. For stunning floor tiles that pair perfectly with this step, visit Eurobath and Tile at https://www.eurobath.co.za/tiles/ and shop today!